Setup
ODBC Drivers
This walk-through provides a step-by-step guide for configuring an ODBC connection, using Power BI as an example. These steps should work for most ODBC-based BI connections.
1. Install Certificate
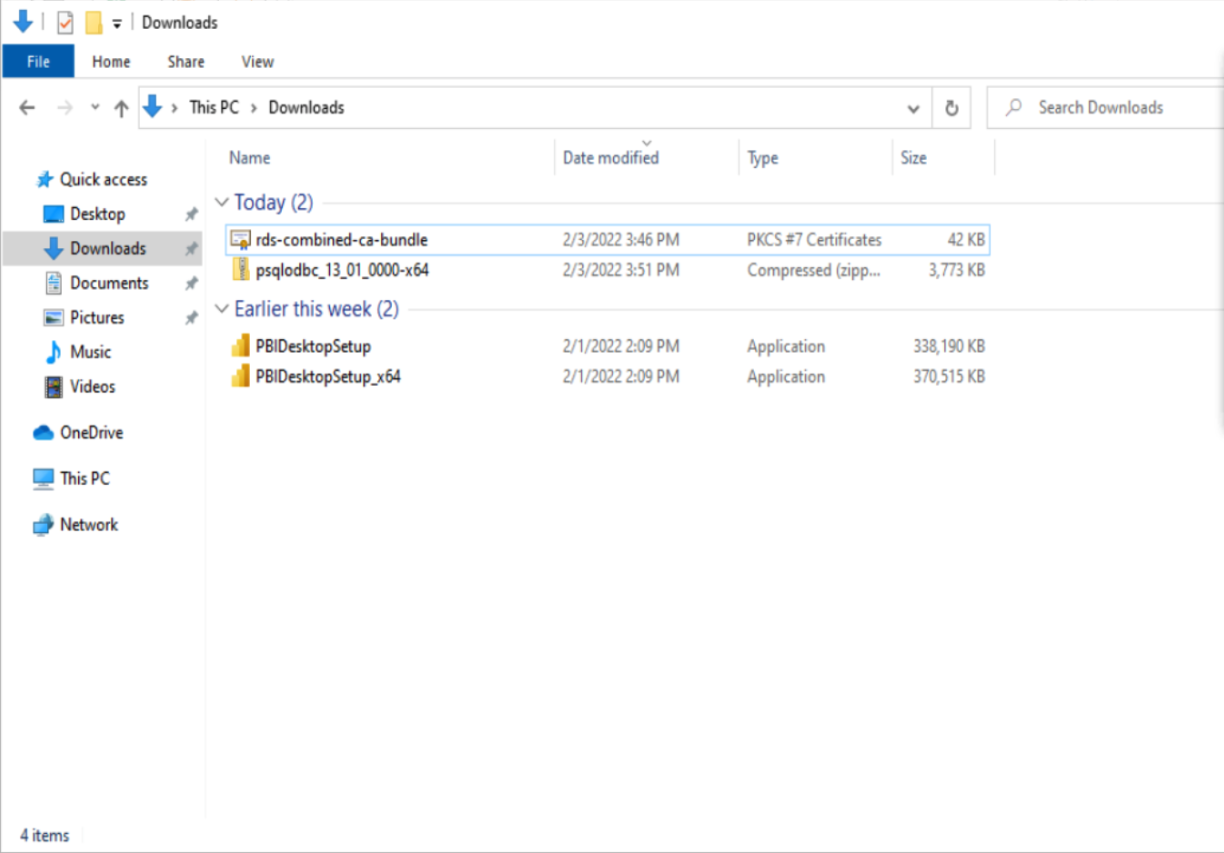
Download the certificate from Amazon's Certificate URL.
- Right-click the downloaded file and select "Install Certificate."
- Install the certificate under "current user" certs.
2. Choose a Configuration Method
In Power BI, you can configure the connection to Amazon Redshift using one of the following methods:
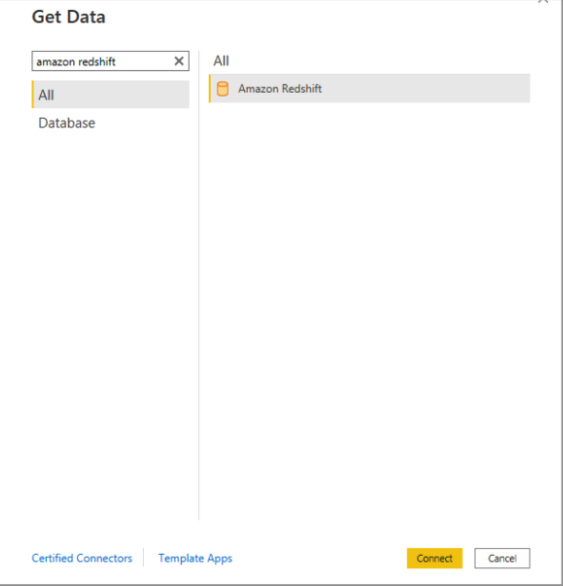
- Amazon Redshift built-in connector
- Original ODBC connector - Download here
- Amazon Redshift ODBC connector - Download here
Note: All of these data sources have been tested and confirmed as working in Power BI.
3. Setup Data Source in ODBC Source Administrator (64-bit)
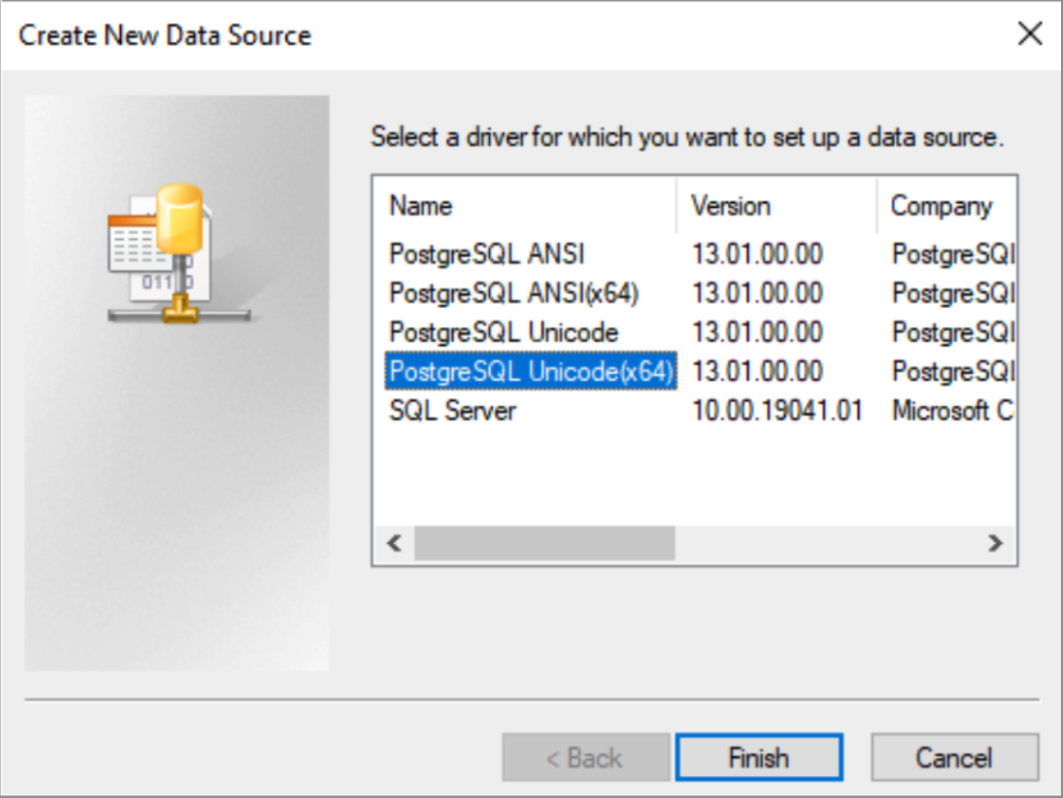
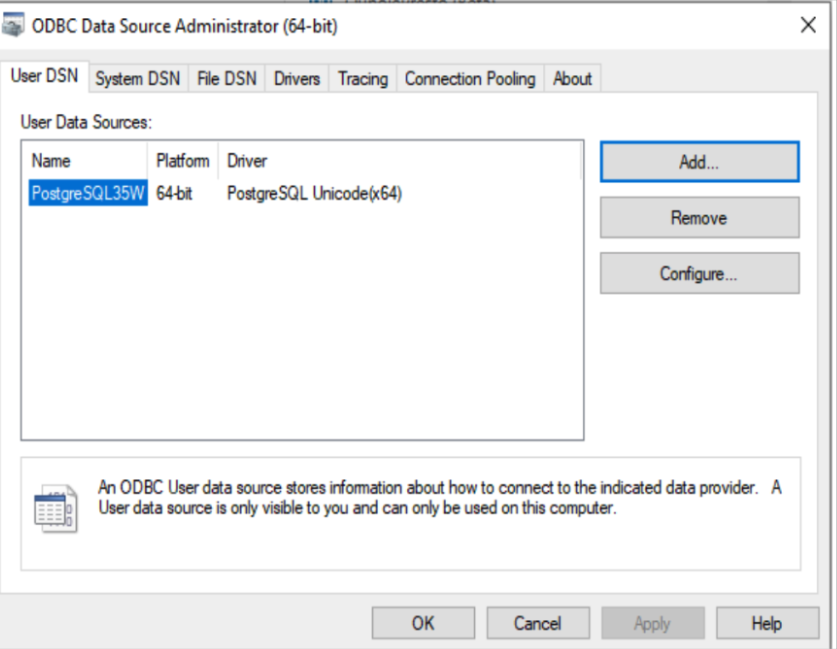
- Go to the User DSN tab and click Add.
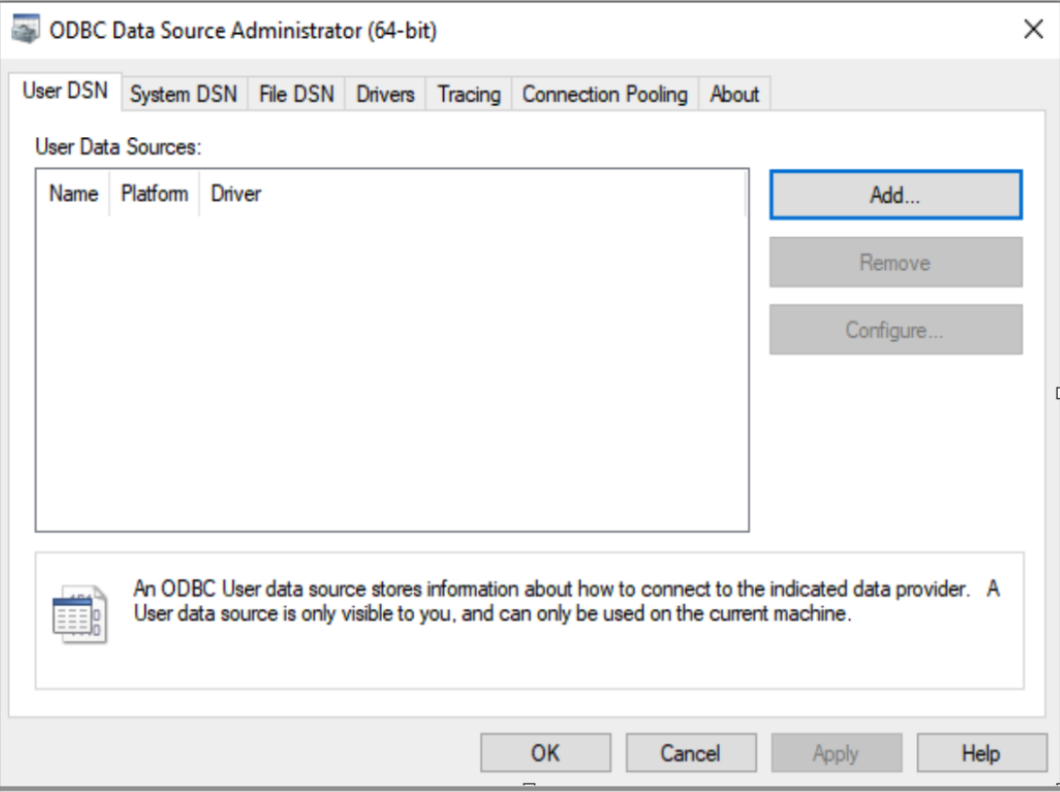
Select PostgreSQL (Unicode) 64-bit driver.
Enter credentials and data source information.
Test the connection to ensure it works.
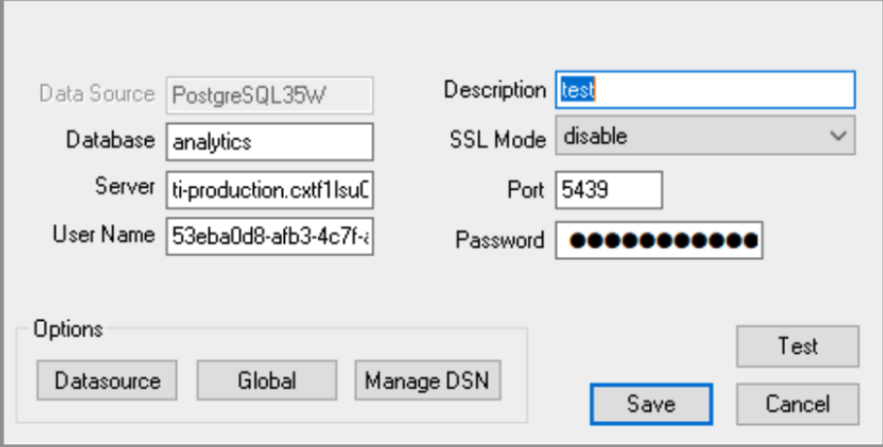
If successful, save the configuration.
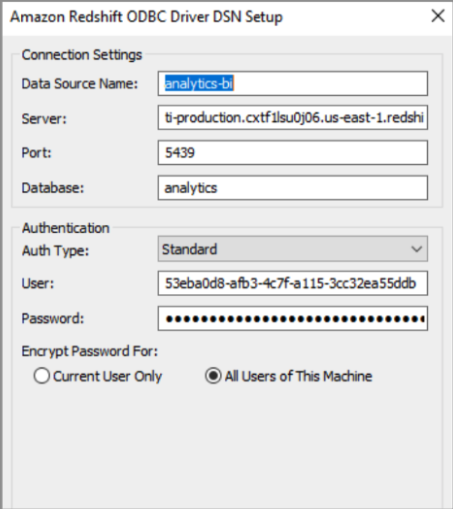
If using the Redshift driver, repeat these steps with the specific settings for the Redshift driver.
4. Setup ODBC Driver in Power BI
In Power BI, choose Get Data from another source.
Search for ODBC, select the option, and click Connect.
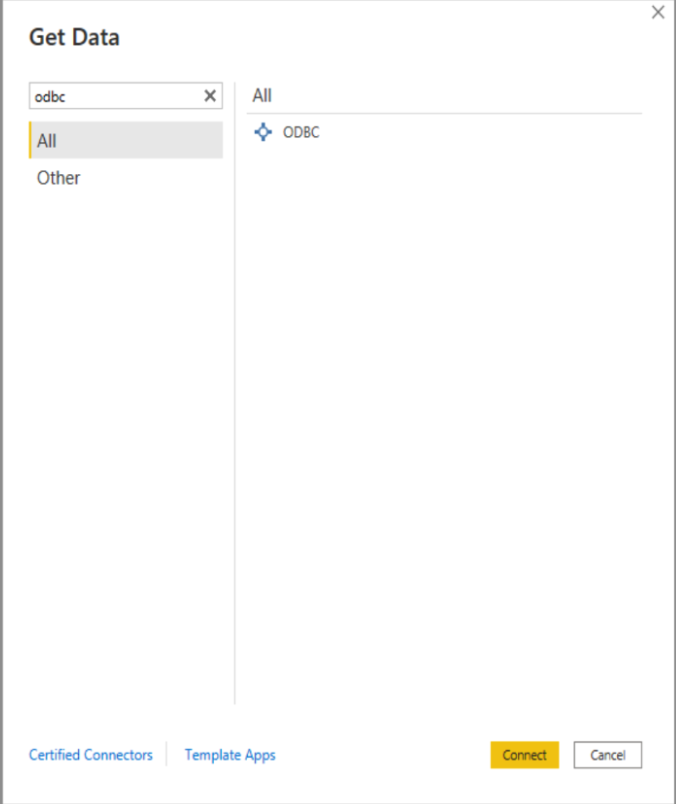
Select the data source configured in Step 3, then hit OK.
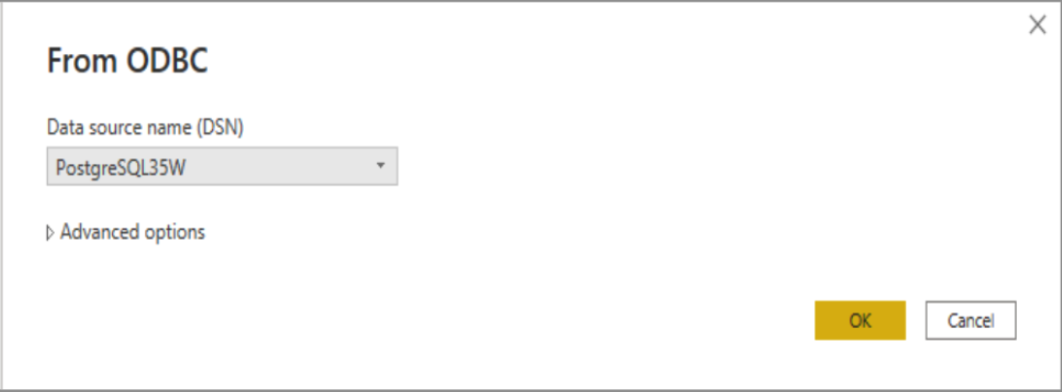
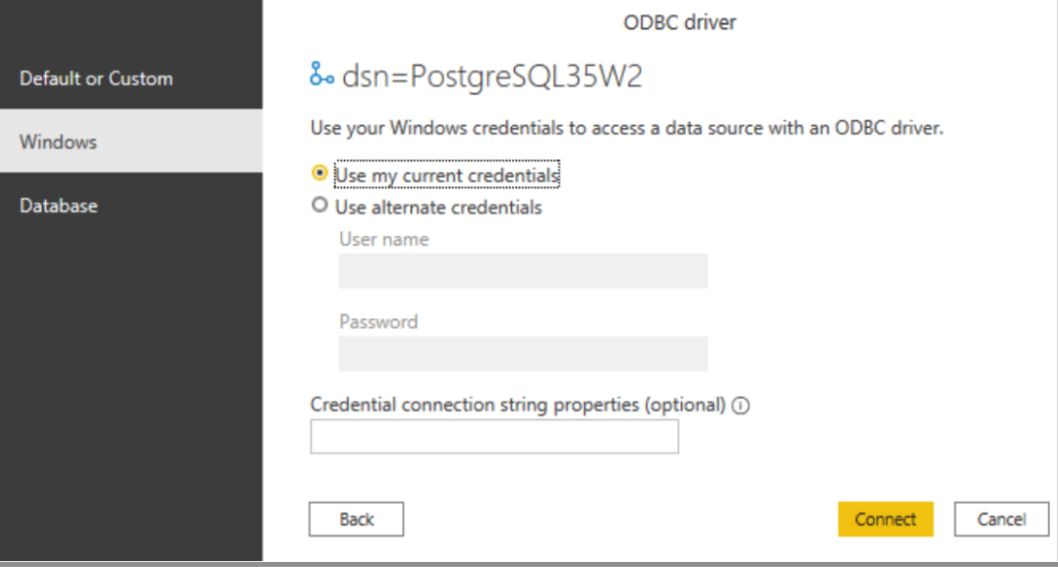
On the credentials screen, switch to the Windows tab and check Using existing credentials.
Connect using the existing credentials.
Alternative Method: If you choose to use the Amazon Redshift option within Power BI, search for Redshift and follow the system prompts.
- When the Navigator window opens in Power BI, select the
bidatabase, which is configured for your use.
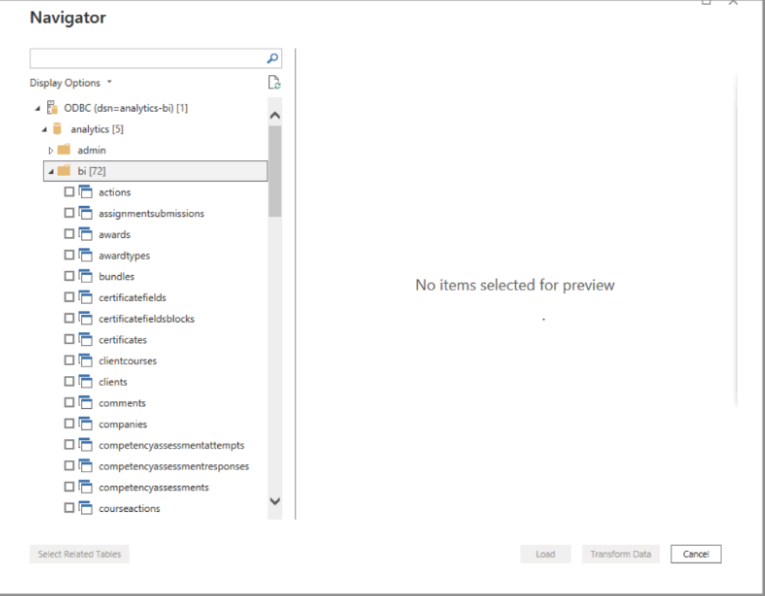
This setup should provide a reliable connection to Amazon Redshift in Power BI for data analysis and reporting.
Help us improve our documentation by sharing your thoughts. It only takes a few minutes and makes a big difference.
Share Feedback
